Advanced J: PDF Reports
警告
This tutorial assumes you have completed the Core Training and have installed wkhtmltopdf.
To follow the exercise, it is recommended that you fetch the branch 15.0-core from the technical training solutions repository. It contains a version of the module created during the core training we can use as a starting point.
We were previously introduced to QWeb in the Core Training where it was used to build a kanban view. Now we will expand on one of QWeb’s other main uses: creating PDF reports. A common business requirement is the ability to create documents to send to customers and to use internally. These reports can be used to summarize and display information in an organized template to support the business in different ways. Odoo can additionally add our company’s header and footer to our reports with minimal extra effort.
The documentation related to this topic can be found in QWeb Templates, QWeb Reports and the Report Actions (ir.actions.report) section of the Actions reference.
File Structure
The bulk of a PDF report is its QWeb template. It also typically needs a corresponding
ir.actions.report to include the report within a module’s business logic.
There is no strict rule for the file names or where they are located, but these two parts are
typically stored in 2 separate files within a report folder in the top level of your module’s
directory. If a module has many or multiple long report templates, then they are often organized in
a logical manner across different files named after the report(s) they contain. All actions
for the reports are usually stored in the same file ending with _reports.xml regardless of the
number of reports it contains.
Therefore it is expected that your work tree will look something like:
estate
├── models
│   ├── *.py
│   └── __init__.py
├── report
│   ├── estate_property_templates.xml
│   └── estate_property_reports.xml
├── security
│   └── ir.model.access.csv
├── views
│   └── *.xml
├── __init__.py
└── __manifest__.py
Note that you will often see other non-QWeb and non-XML files containing “report” in their name also within the report folder. These are unrelated to the reports covered in this tutorial and are covered in another advanced topic. For now you can think of them as customized views that use direct SQL queries (sometimes referred to as SQL Views).
Don’t forget to add whatever files your template and action view will be located in to your __manifest__.py.
In this case you will want to add the files to the data list and remember that the files listed in a manifest
are loaded sequentially!
Basic Report
注解
Goal: at the end of this section, we will can print a report that displays all offers for a property.
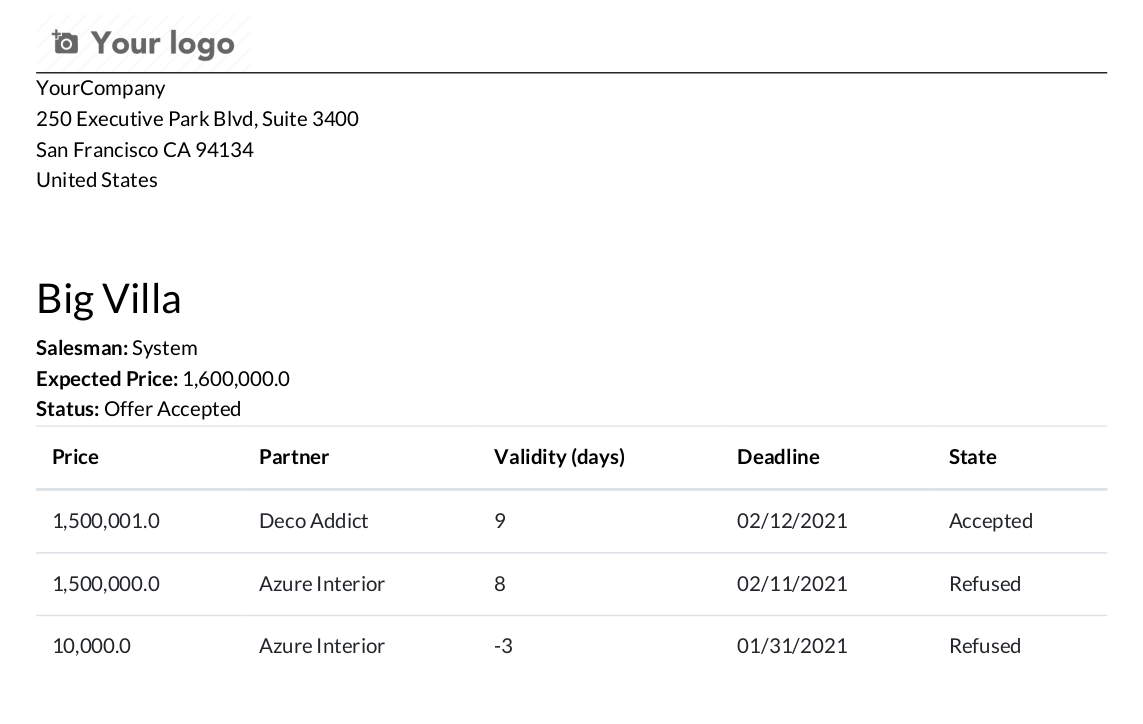
In our real estate example there are many useful reports that we could create. One simple report we can create is one that displays all of a property’s offers.
Report Data
Before we do anything we first need some data to populate our reports or else this tutorial won’t be very interesting. When creating reports, you will need some data to test your report code and check that the resulting look is as expected. It is a good idea to test with data that will cover most or all of your expected use cases. A good representation set for our simple report is:
At least 3 properties where 1 is “sold”, 1 is “offer received” and 1 is “new”.
At least 2-3 offers for our “sold” and “offer received” properties
If you don’t have a set of data like this already, you can either:
Complete Advanced C: Master and Demo Data (if you haven’t done so already) and add the extra cases to your demo data (you may need to create a new database to load in the demo data).
Manually create the data in your database.
Copy this data file into a new directory (data) in your estate module and copy these lines into your __manifest__.py file (you may need to create a new database to load in the demo data).
Before continuing, click through your data in your database and make sure your data is as expected. Of course you can add the data after you write your report code, but then you will not be able to incrementally test portions of your code as you write it. This can make checking for mistakes and debugging your code more difficult in the long run for complicated reports.
Minimal Template
A minimal viable template is viewable under the “Minimal viable template” section of the Report template documentation. We can modify this example to build our minimal property offers template file:
<?xml version="1.0" encoding="UTF-8" ?>
<odoo>
    <template id="report_property_offers">
        <t t-foreach="docs" t-as="property">
            <t t-call="web.html_container">
                <t t-call="web.external_layout">
                    <div class="page">
                        <h2>
                            <span t-field="property.name"/>
                        </h2>
                        <div>
                            <strong>Expected Price: </strong>
                            <span t-field="property.expected_price"/>
                        </div>
                        <table class="table">
                            <thead>
                                <tr>
                                    <th>Price</th>
                                </tr>
                            </thead>
                            <tbody>
                                <t t-set="offers" t-value="property.mapped('offer_ids')"/>
                                <tr t-foreach="offers" t-as="offer">
                                    <td>
                                        <span t-field="offer.price"/>
                                    </td>
                                </tr>
                            </tbody>
                        </table>
                    </div>
                </t>
            </t>
        </t>
    </template>
</odoo>
Most of the Odoo specific (i.e. non-HTML) items in our file are explained in the minimal viable template section. Some additional features in our template are:
The use of the
class="table"attribute so our table has some nice formatting. Twitter Bootstrap (we’re using its table class in this case) and FontAwesome (useful for adding icons) classes can be used in your report template.The use of
t-set,t-value,t-foreachandt-asso that we can loop over all of theoffer_ids.
If you are already familiar with website templating engines, then the QWeb directives (i.e. the t- commands)
probably don’t need much explanation and you can just look at its documentation and
skip ahead to the next subsection.
Otherwise you are encouraged to read more about them ( Wikipedia has a good high level description), but the general idea is that QWeb provides the ability to dynamically generate web code based on Odoo data and simple commands. I.e. QWeb can access recordset data (and methods) and process simple programming operations such as setting and accessing temporary variables. For example, in the above example:
t-setcreates a temporary variable called “offers” that has its value set byt-valueto the currentestate.propertyrecordset’soffer_ids.the
t-foreachandt-asusage is the equivalent to the Python:
for offer in offers:
Report Action
Now that we have a template, we need to make it accessible in our app via a ir.actions.report.
A practical example of ir.actions.report is
here
corresponding to
this template.
Its contents are all explained in the documentation.
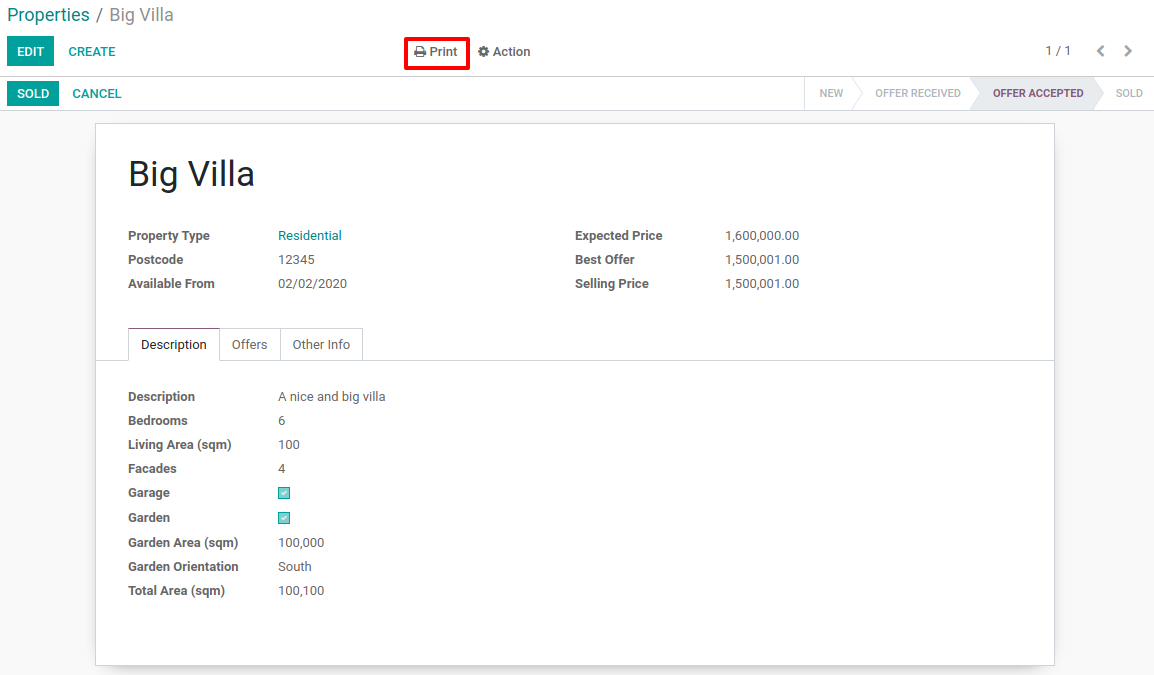
An ir.actions.report is primarily used via the Print menu of a model’s view. In the practical
example, the binding_model_id specifies which model’s views the report should show in and Odoo
will auto-magically add it for you. Another common use case of the report action is to link it to
a button like we learned in Chapter 10: Ready For Some Action?. This is handy for reports that
only make sense under specific conditions. For example, if we wanted to make a “Final Sale” report,
then we can link it to a “Print Sale Info” button that appears in the form view only when the
property is “Sold”.
You may have noticed or are wondered why our report template loops through a recordset. When our template is passed more than one record, it can produce one PDF report for all of the records. Using the Print menu in the list view with multiple records selected will demonstrate this.
Make a Report
Finally, you now know where to create your files and how the content of the files should look. Happy report making!
Exercise
Make a report.
Add the property offers report from the minimal template subsection to the Print menu of the Property views.
Improve the report by adding more data. Refer to the Goal of this section to see what additional data you can add and feel free to add even more.
Bonus: Make an extra flexible report by adding in some logic so that when there are no offers on a property then we don’t create a table and instead write something about how there are no offers yet. Hint: you will need to use
t-ifandt-else.
Remember to check that your PDF reports match your data as expected.
Sub-templates
注解
Goal: at the end of this section, we will have a sub-template that we use in 2 reports.
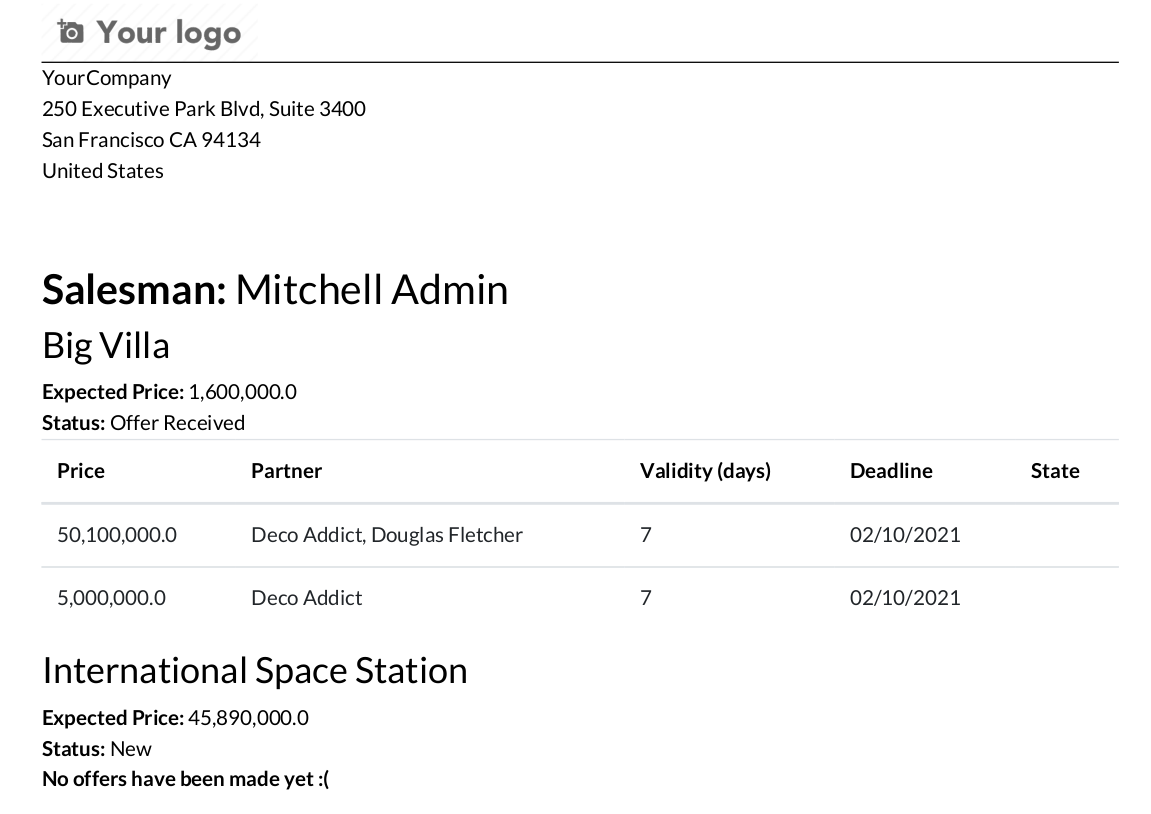
There are two main reasons for using sub-templates. One is to make the code easier to read when working with extra long or complicated templates. The other is to reuse code where possible. Our simple property offers report is useful, but listing property offers information can be useful for more than just one report template. One example is a report that lists all of a salesman’s properties’ offers.
See if you can understand how to call a sub-template by reading the documentation on it and/or by looking at an example (remember QWeb uses the same control flows regardless if it is for a report or a view in Odoo.)
Exercise
Create and use a sub-template.
Split the table portion of the offers into its own template. Remember to check that your original report still prints correctly afterwards.
Add a new report for
res.usersthat allows you to print all of the Real Estate Properties that are visible in their form view (i.e. in the “Settings” app). Include the offers for each of those saleman’s properties in the same report. Hint: since thebinding_model_idin this case will not be within the estate module, you will need to useref="base.model_res_users".Your end result should look similar to the image in the Goal of this section.
Remember to check that your reports match your data as expected!
Report Inheritance
注解
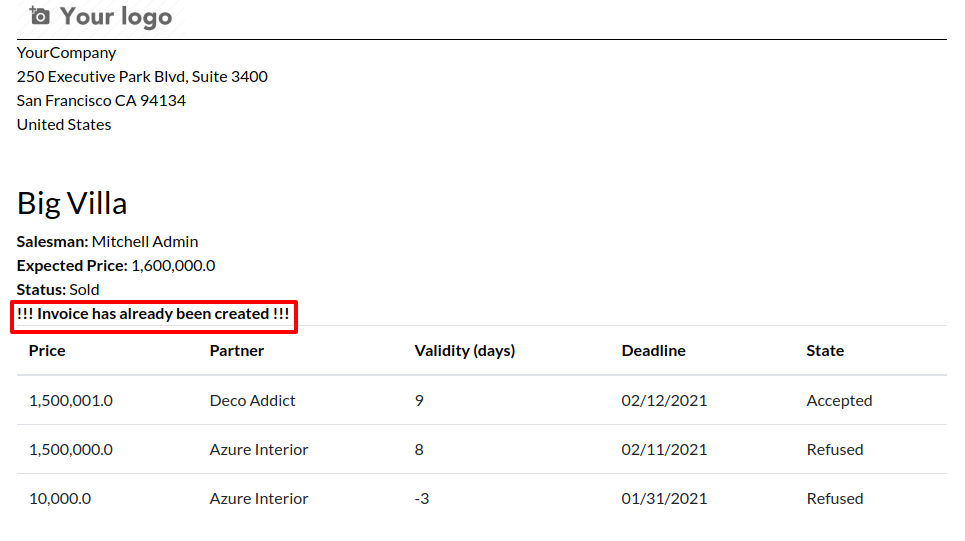
Goal: at the end of this section, we will inherit the property report in the estate_account
module.
Inheritance in QWeb uses the same xpath elements as views inheritance.
A QWeb template refers to its parent template in a different way though. It is even easier to do by just adding
the inherit_id attribute to the template element and setting it equal to the module.parent_template_id.
We didn’t add any new fields to any of the estate models in estate_account, but we can still add information
to our existing property report. For example, we know that any “Sold” properties will already have an invoice
created for them, so we can add this information to our report.
Exercise
Inherit a report.
Extend the property report to include some information about the invoice. You can look at the Goal of this section for inspiration (i.e. print a line when the property is Done, otherwise print nothing).
Again, remember to check that your reports match your data as expected!
Additional Features
All of the following extra features are described further in the QWeb Reports documentation, including how to implement each of them.
Translations
We all know Odoo is used in multiple languages thanks to automated and manual translating. QWeb reports are no exception! Note that sometimes the translations do not work properly if there are unnecessary spaces in your template’s text content so try to avoid them when possible (especially leading spaces).
Reports are web pages
You probably are tired of hearing that QWeb creates HTML, but we’re saying it again! One of the neat features about reports being written in QWeb is they can be viewed within the web browser. This can be useful if you want to embed a hyperlink that leads to a specific report. Note that the usual security checks will still apply to prevent unauthorized users from accessing the reports.
Barcodes
Odoo has a built-in barcode image creator that allows for barcodes to be embedded in your reports. Check out the corresponding code to see all the supported barcode types.