Inter-warehouse transfers
When owning several warehouses, you might need to transfer goods from one warehouse to another. Proceeding to such behavior is called inter-warehouse transfers. If this action is physically easy to perform, the administrative part can be arduous. Fortunately, Odoo comes with an intuitive flow that helps save time when registering those transfers.
基础配置
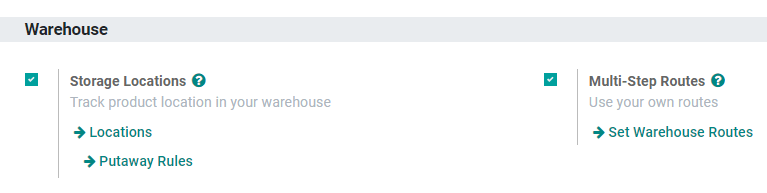
First of all, go to and enable Storage Locations. Then, hit save.
重要
If you want to manage several routes within your warehouses, then enable Multi-Step Routes and check 使用路线和推/拉规则.
创建一个新的仓库
The next step is to create your new warehouse. To do so, go to and click on Create.
Fill out a Warehouse Name and a Short Name. The short name is five characters maximum.

重要
The Short Name appears on your transfer orders and other warehouse documents. We recommend using an understandable one (e.g.: WH/[first letters of location]).
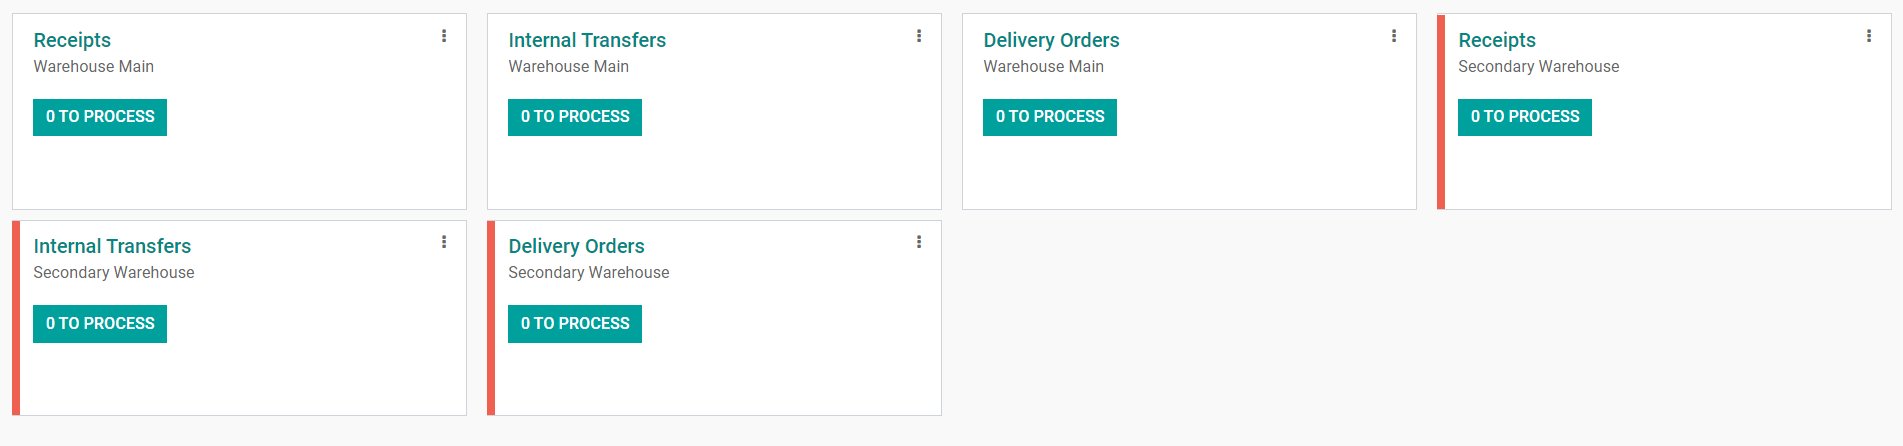
Now, go back to your dashboard. There, new operations related to your warehouse have been automatically generated.
创建一个新的库存
If you create a new warehouse, you might already have an existing inventory in it. In that case, you should create an inventory in Odoo. If this is not the case, you can skip this step.
Into the inventory application, select . Then, create a new inventory by clicking on Create. Fill in the Inventory Reference, Date and make sure to select the right warehouse and location.
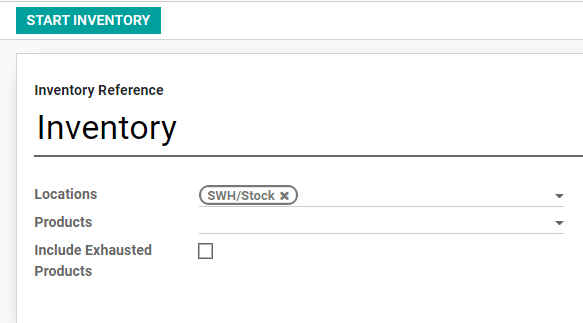
Next, click on Start Inventory. You will be able to input your existing products in the new window. Select add an item and indicate the Real Quantity available in the warehouse. The theoretical quantity can not be changed as it represents a computed one from purchase and sales orders.

小技巧
Don’t forget to validate your inventory once you have recorded the state of all your products.
创建内部调拨
The final step is to create your internal transfer. If you want to transfer eight units of a product from your first warehouse to another one, proceed as follows:
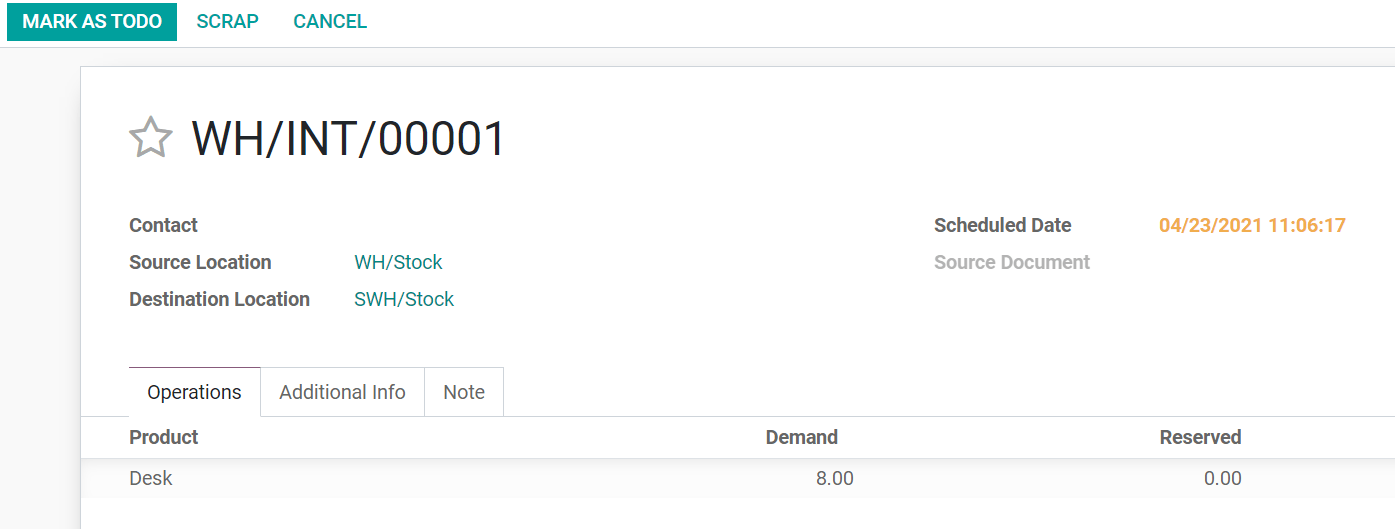
From your dashboard, select an internal movement of one of the two warehouses. To do so, click on .

On the new window, select the source location zone (in this case, your “old” warehouse) and the destination location zone (in this case, your “new” warehouse).
Add the products you want to transfer by clicking on Add an Item, then click on Save and Mark as TODO once you are done.
If you selected Immediate Transfer, Odoo processes the transfer automatically after you clicked on Validate.
If you select Mark as TODO, Odoo puts the transfer in Waiting Availability status. Click on Reserve to reserve the number of products in your source warehouse.
也有可能人工调拨每一个产品 :
通过仪表盘在源库位中选择调拨单。

Select the right transfer order.

Click on the little pencil logo in the lower right corner to open the operation details window. In this new window you can manually indicate how many products you process.
注解
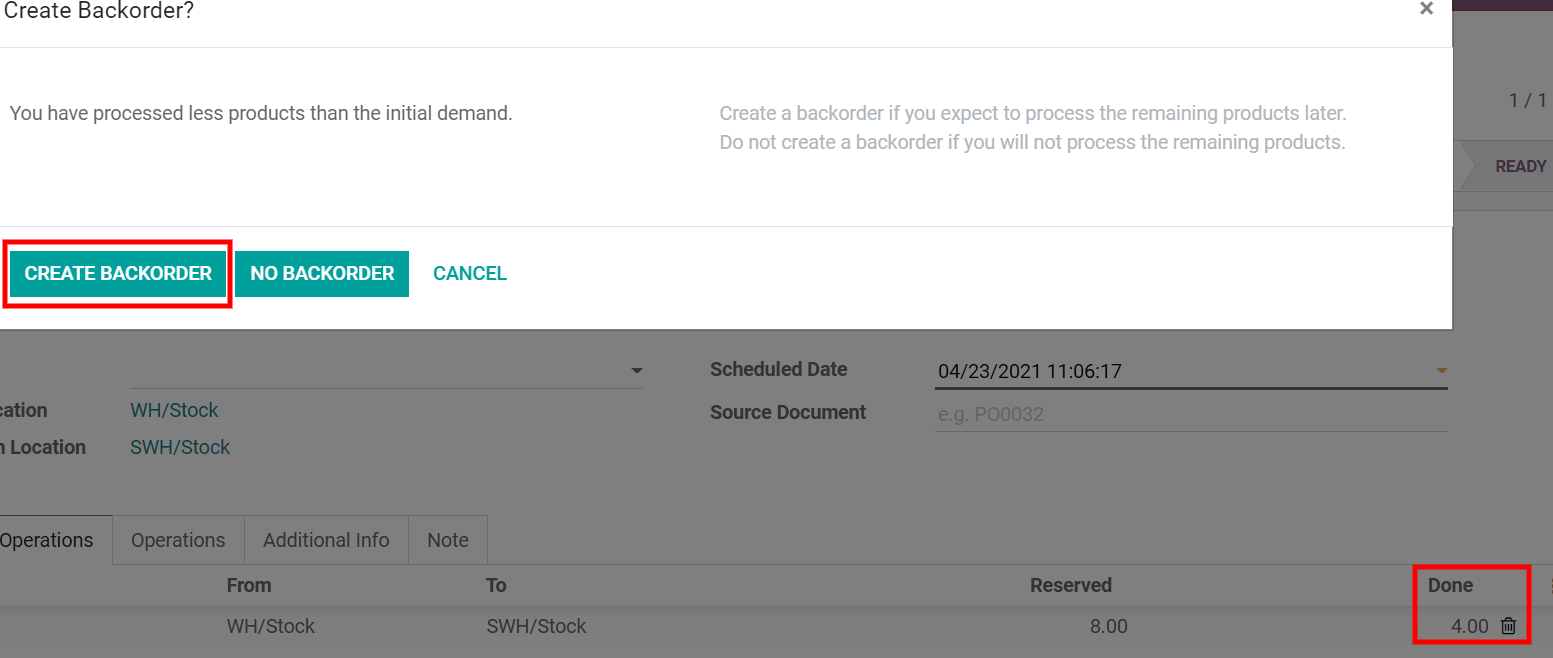
If you decide to process the transfer order partially (e.g., a part of the products can’t be shipped yet due to an unexpected event), Odoo automatically asks if you wish to create a backorder.
Create a backorder if you expect to process the remaining products later.
Do not create a backorder if you will not supply/receive the remaining products.